 How to avoid waste in binding and print finishing.
You may remember the late Steven Covey used to say about life, “Begin with the end in mind.” It’s great advice. It has applications in most things in life. If you are building a business, you can begin with the end in mind. Understanding, the steps you need to get there.
I use the same in my print finishing and binding planning. If you are producing big publications, the last step in the process is your print finishing and binding processes. Yet, you kind of have to consider these steps during the first step of design. Graphic designers who fail to do this will inevitably design publications in which the text and images end up in the wrong place. The result can be costly re-design, re-printing and re-binding work.
Different Binding Types Available
Obviously, there are several ways to finish documents and understanding the diffrence between the ways to do it, can help you avoid wasting time and money. Here are the most common processes for print finishing and binding:
MBM Stitchmaster is simple and cheap and often all that’s needed. Loose sheets are laid over a saddle-like holder where staples are forced through the spine of the pages at a very rapid rate. The more pages in the publication, the more likely pages will “creep” as they move through the process. So you should allow for larger margins, particularly if the outside edge of the bound job is to be trimmed flat.
Side-stitch binding is similar to saddle stitching, except that the staple is forced through the sides of the pages near the folds instead of through their spines. The resulting binding is not quite as nice as saddle stitching, so don’t use this if you’re releasing this to an audience who needs to be impressed by your work. Plus, this will chew up a lot of margin space, so allow for at least a 1.5″ inside margin.
Perfect binding starts with all of the project’s pages placed together and stitched through the spine. Then the spine edge is ground flat and the cover is glued on. While page creep is less of a concern, wider inside margins may be needed to prevent page content from disappearing into the center of the publication, particularly if there are many pages.
Case binding is almost the same as perfect binding, with the added step of reinforcing the spine with a cloth strip before attaching the cover. Treat it like perfect binding when laying out margins.
Comb binding, the plastic teeth of a comb are inserted into rectangular holes punched along the edge of the pages. This allows the finished publication to lie flat when open and the spines can be removed and reattached. But adding a printed spine is difficult and wider inner margins are needed to keep text and images away from the holes. If you want to do a two-page spread of data or images, don’t. If you have to, cut the image or data, figure the margin space, and have the information jump the page. Otherwise, you lose important information in the holes and the comb.
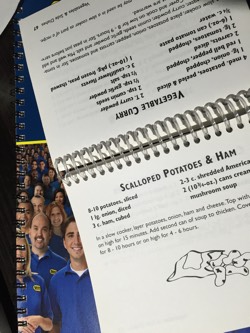
Coil binding or spiral binding involves threading a wire or plastic spiral through round holes punched in the edges of a stack of the pages. This method also allows the finished publication to lie flat when opened. The inner margins of pages must be wide enough to prevent punching holes into page content, and it’s very hard to add a printed spine. Again, it’s hard to have a two-page spread for data or a photo, although it can be done. The problem is getting two lines of data, like a spreadsheet, to line up properly, especially on a spiral. If you have to do that, consider. . .
Wire binding uses tooth-like loops of wire in a fashion similar to comb binding, but produces a much sturdier binding. Plus, the pages open perfectly in line, so you can keep lines of data perfectly aligned.
Post binding is simply a few metal posts pushed through punched holes in the pages and anchored with bolts that thread into the center of the posts. The final publication can have an external cover with an imprinted spine. Pages can be added or removed easily. Again, what’s printed on each page could be lost from view in the center if the interior margins are not wide enough. Figure a 1.5″ inside margin here too.
Graphic design needs to consider all these options when setting up a publications design. Depending on which binding solution you choose will determine how the document needs to be design.


One comment