Binding Machine Margins
As more graphic designers are being trained for web production instead of print, they tend to forget the small details. Little things like trying to print a web graphic, when it should be a vector graphic. Or, designing print using an RGB palette, instead of a Pantone palette. The biggest mistake when preparing documents for a binding project is not setting proper margins for print jobs going through a binding machine.
Why is this important?
Well, it is a simple answer: Cost
Customers have printed their documents, only to find out the margins were not properly set for binding. So, imagine, a stack of documents that can not be bound together because the punch is actually running through the text, or it is too close to the edge to account for the binding.
The result is most designers usually only make this mistake once, and then the lesson is remembered forever. But it can still be an expensive mistake to make, if you don’t have someone who catches it before the job prints, or if you have to do an expensive reprint. If it is not margined properly, the binding machine can not fix it.
So how wide should your margin be?
Before you start, be sure you use the proper margin settings. When you setting up a new document in your page layout program, be sure you select the option that lets you set inside and outside margins, not left and right margins. You use left and right margins if you’re printing one-sided sheets, like a typical report. You should be able to select double-sided as a layout option, which should then activate the Inside/Outside layout option.
Here are a few important points to keep in mind, based on the different bindery options and binding machine options.
[box]
MBM Stitchmaster:
This is the typical staple-in-the-center binder method. While you don’t lose a lot of interior space, you will lose a little on the outside. That’s because when you stack several folded sheets together, you start to get a fanning effect, where the innermost pages stick out beyond the front cover. When this happens, the pages have to face cut, and you can lose as much as .25 inches off the outside margin.
We suggest allowing at least a 1/2” margin on the binding edge of each page of your book and at least a 1/4” margin at the top, bottom, and outside edges of each page.
To be completely sure, talk to your printer and see what they recommend. If you are looking for a stitching machine, the MBM stitchmaster can be found here:

| Add to cart |
Perfect Binding:
Your typical bookbinding. Most book publishers want a 1.5″ margin for an inside margin. Take a look at a book, and see how much you’re able to see on the pages in the middle. As you get further into the book, the pages are harder to open, which means you need some extra white space.
This should be pretty consistent with hardcover books, thermal binding books, or MasterBind channel books.

| Add to cart |
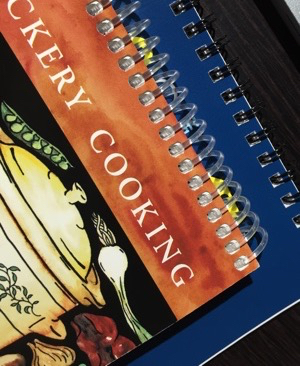
Comb, Coil, Spiral, and Wire binding:
These books are made to lay flat, unlike perfect bound books. It’s like laying two stacks of paper side by side, with about a .25 inch gap between them. Because of this, graphics should not cross pages. That is, don’t create a two-page photo spread, especially if you’re going for something really fancy and high class.
You can do it with saddle stitching, especially if you can land it on the center page of the book, but it just doesn’t look good with these spreads. The margin for these books should run around 1.5″, but can go up to a 2″ inside margin. Talk to your printer to find out what he or she recommends.
If you have any critical content including backgrounds or images proceeding to the edge of your pages, you will want to include a 1.5” bleed on all four edges of your pages so no critical content is cut during binding.
")
| Add to cart |
[/box]
Of course, if you have any questions about margins and binding machines, you can always give us a call to discuss or email us a question at sales@lloydsofindiana.com. We will be happy to answer your questions.
You hit the nail here. It is true that printing is sometimes taken for granted. I experienced this during my first year. Glad that I noticed it before the final printing (whew!)
You hit the nail here. It is true that printing is sometimes taken for granted. I experienced this during my first year. Glad that I noticed it before the final printing (whew!)